
About
Live Template Editor is a professional tool which allow customization and editing of a wide range of templates from pre designed gallery without writing a single line of code.
Editor
Interface
Based on the template category, the editor’s interface shows multiple areas
The tool has 4 major components. Each one is using different functions in order to smooth the editing, saving and installing process.
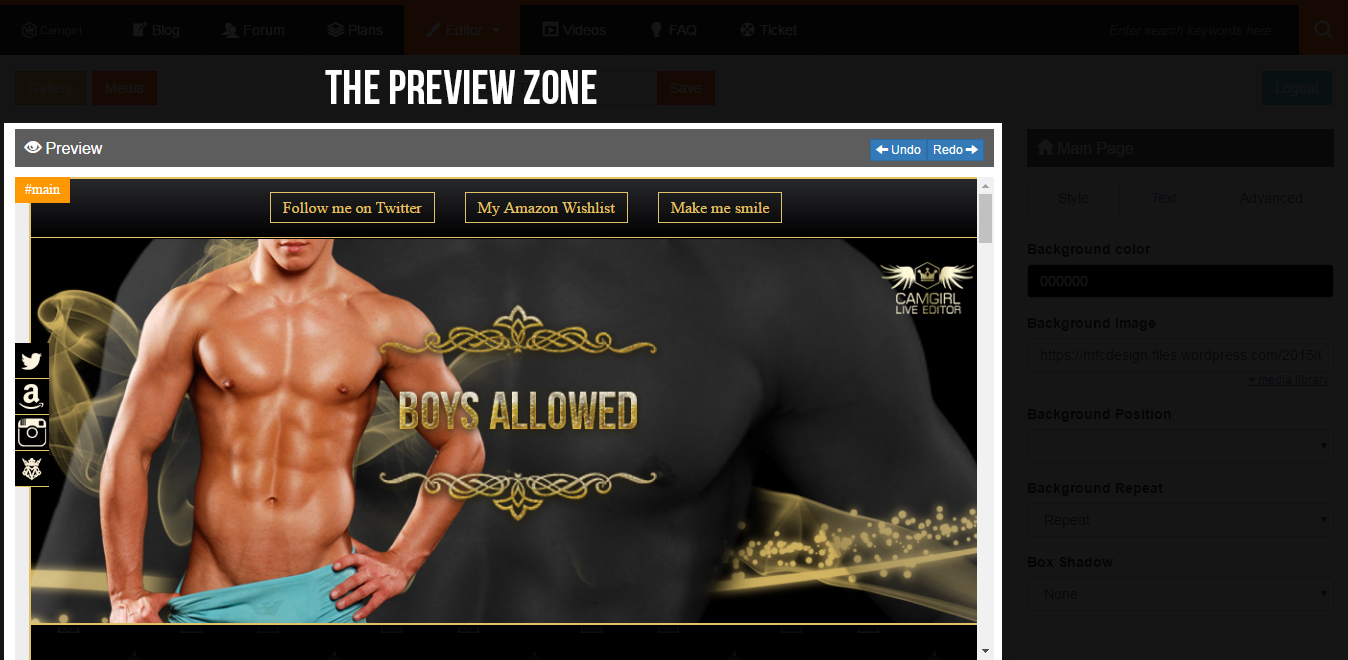
1. The Preview section
Is the section where your project (template) is edited in live mode.
Visually defined as Preview with an eye icon in the left. On the right side but in the same Preview section there are 2 buttons for Undo and Redo steps of your editing process.
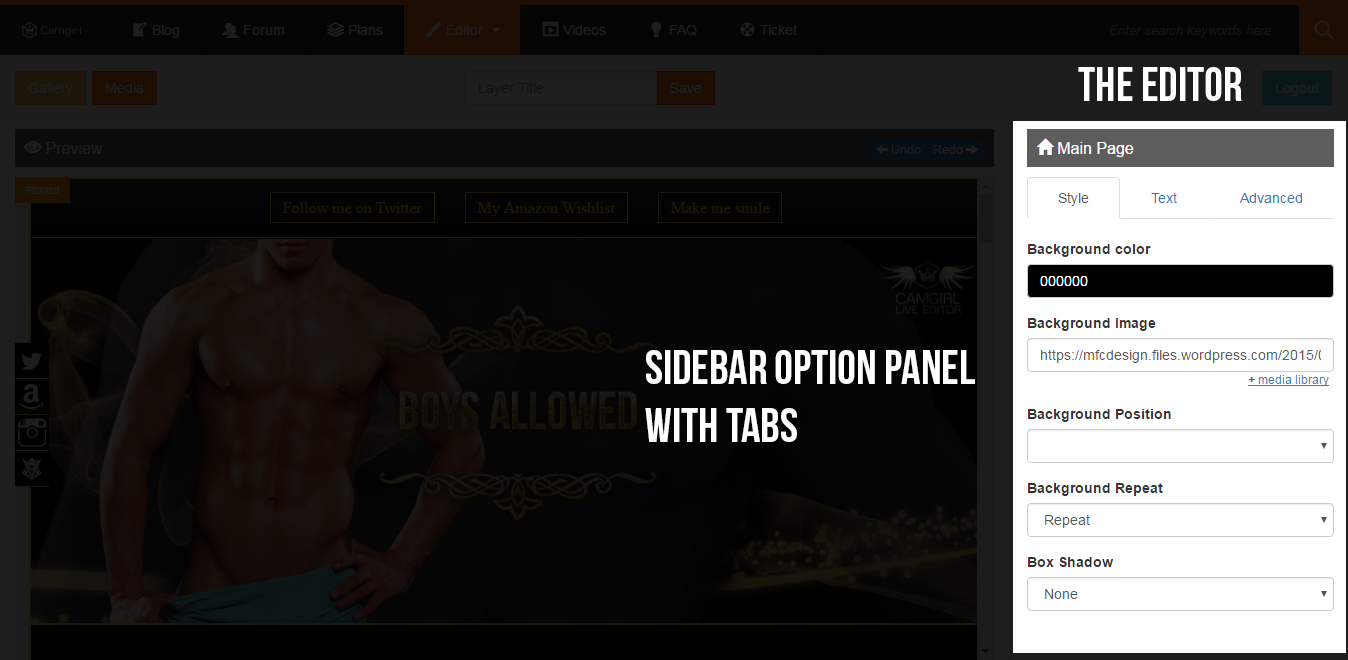
2. The Editor section.
This section is placed in the right side (right sidebar option panel). The Editor (or sidebar panel) holds all the functionality and options you need in order to edit your project.
As you can see from the below printscreen, the sidebar includes tabs. Each tab is showing all available options for elements you want to edit.
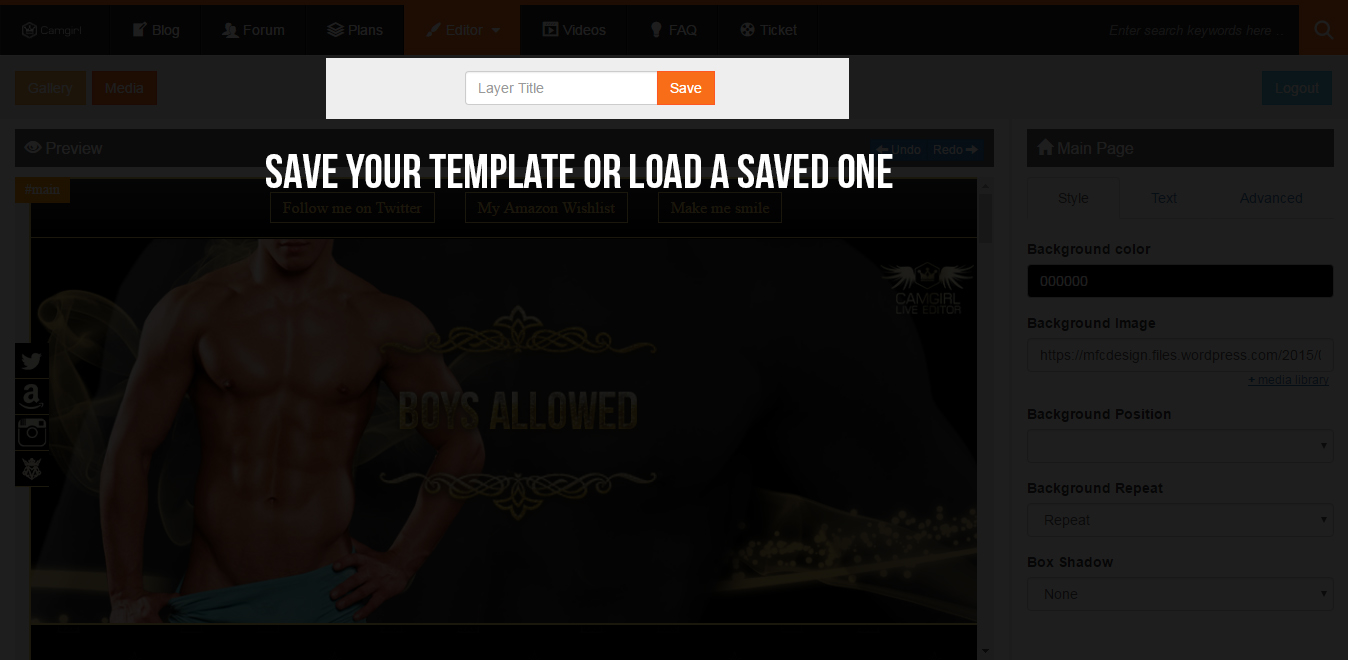
3. Save your template or Load a saved template.
Starting with commercial plans this option allows a limited number of templates to be stored (saved) for further editing.
For example, you just finished to edit your astonishing project, name it and click the Save button. Now all your work is saved.
You need to add or replace some content on your page and adding it manually can be frustrating or you might even forget to close some tags, all your work is now a mess. Here comes the solution. Access the Live Editor and load your saved template for further editing.
4. Install your custom design on Chaturbate
Ready to install? The HTML code is updated and ready to work for you. All you need to do is to click the right button named Copy HTML code and paste it on your Chaturbate or Camgasm bio page following this path:
Log in to your account ┬╗ navigate using tabs to your Bio tab ┬╗ Click the Edit Your Bio link ┬╗ paste the code in your available box — It works on Wishlist box too.

Sidebar Panel
The sidebar panel aka Editor panel is where all functions are shown and allows you to edit elements [reference]
Sidebar Panel — Tabs
Based on the selected element (button, text, image, link) the tabs are showing all available options for that particular selected element
Image element selected
If a graphic (image) element is selected from the Preview window, the Sidebar panel will show all available options.
- Style tab — options available
- Background color
- Background Image
- direct URL path of the image
- + add from media library
- Background Position
- Default
- Bottom
- Center
- Top
- Right
- Left
- Background Repeat
- Default
- Repeat
- Horizontal
- Vertical
- None
- Box Shadow
- Default
- Close behind
- Near below
- Near below right
- Far below
- Far below right
- None
- Image tab — options available
- Change Image
- direct URL path of the image
- + add from media library
- Add link
- direct URL path of the image
- Reflect – css3 effect
- Default
- Short below
- Deep below
- Deeper below
- None
- Rotate — css3 effect
- use the slider
- Change Image
- Filters — options available css3
- Grayscale
- Blur
- Brightness
- Contrast
- Hue Rotate
- Opacity
- Invert
- Saturate
- Sepia
- Advanced — options available
- Visibility
- Visible
- Remove
- Width
- Height
- Padding
- Margin
- Visibility
Text element selected
Text element or text box element is selected from the Preview window, the Sidebar panel will show all available options.
- Style tab — options available
- Background color
- Background Image
- direct URL path of the image
- + add from media library
- Background Position
- Default
- Bottom
- Center
- Top
- Right
- Left
- Background Repeat
- Default
- Repeat
- Horizontal
- Vertical
- None
- Box Shadow
- Default
- Close behind
- Near below
- Near below right
- Far below
- Far below right
- None
- Text tab — options available
- Font Size
- use the slider to make the text size smaller or bigger
- Text Color
- color picker available
- Font Family
- offers the option to change the default font
- Font Weight
- bold
- normal
- Text Align
- left
- right
- center
- justify
- Text Shadow
- Default
- Close behind
- Close right
- Close below right
- Near below
- Near below right
- Far below
- Far below right
- Farther below
- Farther below right
- None
- Font Size
- Advanced — options available
- Visibility
- Visible
- Remove
- Width
- Height
- Padding
- Margin
- Visibility
- Links — options available
- Image Link
- Add link – http user input field
- Text Link
- Add link – replace # default sign with your URL
- Image Link
Preview Window
The Preview Window is where the live editing process is shown – [reference]
Preview box allows element select by click. Each selected element triggers the available options shown in the right sidebar
After editing an element, Preview makes the necessary modifications live
- Undo – Redo buttons
- Undo — when editing is made, this button goes back one step (one click, one step back) — Not available for text editing
- Redo — when editing is made, this option allows redo a step — Not available for text editing
Copy Code
Based on editing template there might be one or two generated codes — [reference]
For Chaturbate the editing process is rendering a single box
For MyFreeCams templates the process is rendering two boxes with two types of markup (HTML and CSS)
- Undo — Redo buttons
- Undo — when editing is made, this button goes back one step (one click, one step back) — Not available for text editing
- Redo — when editing is made, this option allows redo a step — Not available for text editing