Templates Camgirl.Cloud › Forums › Services › Website › Create your WordPress free website
- This topic has 0 replies, 1 voice, and was last updated 6 years, 11 months ago by
 CGC.
CGC.
-
AuthorPosts
-
-
June 29, 2018 at 8:03 am #57613
Wordpress is by far the most popular platform for blogging and other types of websites.
Due to it’s popularity the WordPress (as a CMS platform) benefits from a huge community providing support, experience and resources (like themes, plug-ins, advice and so on…)
Wordpress has two main services, the free service and commercial (paid service) plus the self-hosted platform.
Now we will guide you through the basics of creating and setting-up a free website using the WordPress service.
To make it easier for you to understand, we’ll use “step-by-step” suggestions.
Step 1.
Create your WordPress account.

Step 2.
Choose your website type. WordPress is offering you the opportunity to choose between 3 types of websites (blog type, website type and portfolio type).
For this tutorial we’ve chosen the blog type.

Step 3.
Choose a theme (a template). Don’t worry much, you can choose another template “further down the road” — later.

Step 4.
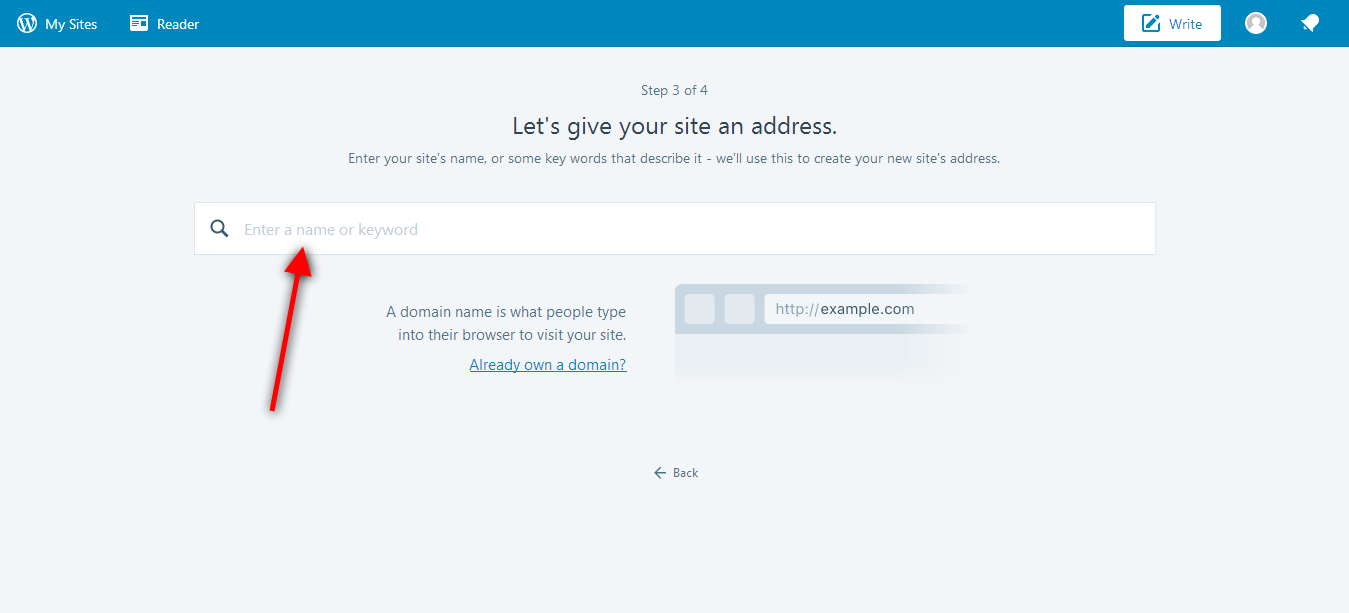
Choose your site’s name. Take your time and make sure your desired name is related to your activity, make it appealing and easy to remember. Based on the name of your website, WordPress will generate the URL address (you can change that later).

Step 5.
Choose the free plan and go live.

Step 6. (optional….can be done later)
Add your contentStep 7.
Access the Admin area.

Settings page
From administrative area (the Dashboard), you can set-up (change) the Name of your website, tag line and a lot of useful options
Sidebar > Settings > General
site name – important
tag line – important
site icon – important
time zone
date format (optional)
time format (optional)
week starts… (optional, based on your location)
language (you can choose your native language or English)
Remember, each time you make changes, before navigating away from current page, save your changes.Because we want to cover the basics and most important features, let’s skip some steps and dive into …
WordPress – Uploading Images (media)
All the magic happens by accessing the sidebar from administrative area so, go ahead and hover (pointer over the tab) the Media tab.You will see two options:
Library – this section is displaying all your uploaded media files (images, videos, and other file formats accepted by WordPress)
Add New – self-explanatory; The option to upload new files.
Wordpress CMS is made to be simple to use but behind this simplicity there is a powerful development. You can drag-and-drop you media files directly into the drop field.Note: we’ve changed to older interface because it is much more easier to explain. You can switch to new or older interface by editing the url… don’t worry about that right now… the process is the same in both versions. We like the older version because it also shows the URL (direct full path) of the uploaded image..
This is the direct upload option.
The second option is when writing a post/page/article, using the Media button from the Editor
-
-
AuthorPosts
- You must be logged in to reply to this topic.


